

Contents
- 1 Elegant and stylish:
- 2 Matching paint with their bike:
- 3 Revamp the old helmet:
- 3.1 1- Get all supplies and equipment ready:
- 3.2 2- Disassemble the helmet:
- 3.3 3- Make your helmet ready:
- 3.4 4- Do sand the helmet:
- 3.5 5- Mask your helmet with masking tape:
- 3.6 6- Apply the undercoat:
- 3.7 7- Paint the helmet:
- 3.8 8- Apply the coats:
- 3.9 9- Apply the transparent coat:
- 3.10 10- Unmasking and reassembling:
- 4 Conclusions:
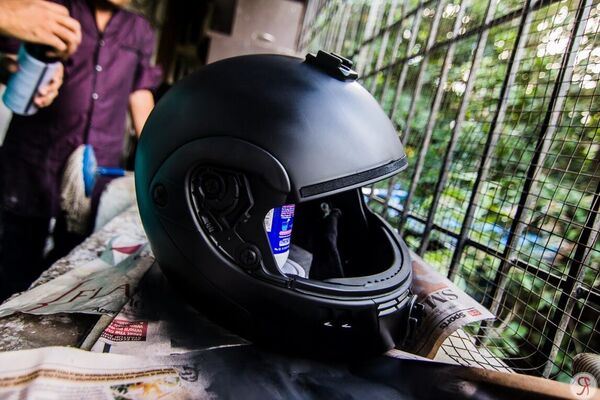
I want to repaint my motorcycle helmet in flat black and do you know how to paint a motorcycle helmet flat black. This question is asked by many motorcycle riders who want to repaint their helmet. The most of motorcycle riders wants to paint their helmet but they don’t know how to do it.
Helmet is most important gear for the riders while riding their bike. It provides safety and comfort during their ride. Safety is the imperative factor which every rider should consider while riding. Helmet fulfills this need of rider and gives full protection and safety during your journey.
Some riders just want the best helmet that provides the guaranteed safety and nothing else matters for them. Some riders also care about the looks and design of the helmet along with the safety factor. Sometimes you can’t get both characteristics in one helmet and you to compromise for one which is mainly the color or design of the helmet.
Though, it can’t be the only reason to paint your helmet in elegant and stylish flat black color.There could be multiple reasons to which few of them we are going to discuss below.
Elegant and stylish:
Many riders want to look cool and stylish on the road while wearing their gear. Elegancy and looks what they desire for while riding on a bike with a helmet on. Sometimes riders focus on some features that are important to their safety and ignore the color and design.
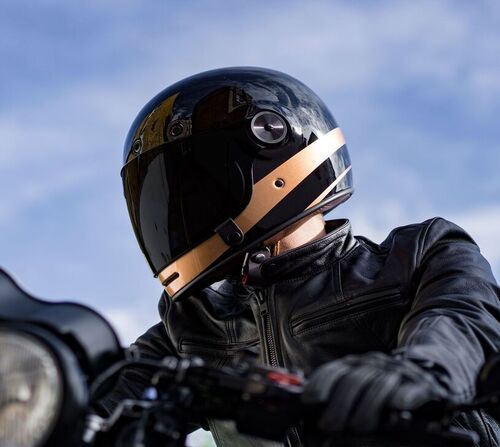
So, people who opted for these helmets want to do with the look of the helmet to give them a classy and stylish look. They considered the option of repainting.
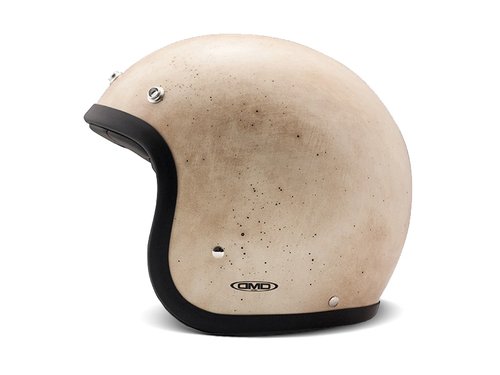
Matching paint with their bike:
Sometimes after buying the helmet the rider may think of getting a matching helmet with the color of their bike. They cannot invest in buying the other helmet of same color. So, they want to repaint the helmet to get a unique look. This is the most economical way of getting the desired look of the helmet.
Revamp the old helmet:
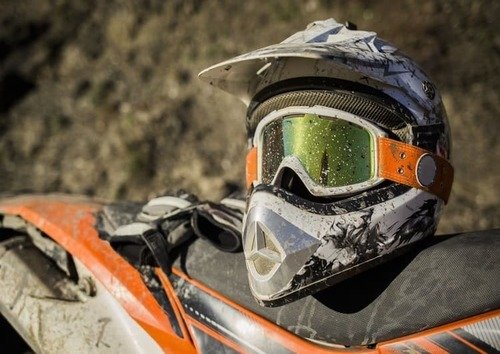
Sometimes the rider may get tired of the same old look of its helmet. He wants to change it and have a new one. In many cases helmets also gets faded and have cracks of paints on it which is definitely don’t want to put on while going for ride. It will not only look bad but also lowers your confidence.
Repainting is the best option to consider in these situations. It will save you from spending your savings on the new helmet.
Hence whatever your reasons could be repainting is always a good and affordable option. It is definitely not a new technique as it is observed by many riders. Many riders want to color their helmet in flat black as it looks sleeker stylish and classy.
It also happens to be my case as my favorite color is black and I always want my helmet to be in flat black. So from my experience I decided to help others who don’t know how to paint a motorcycle helmet flat black.
Here I will guide you through a detailed and inch by inch process of painting a helmet in flat black.
1- Get all supplies and equipment ready:
Before start painting your helmet you must make sure that you have all the required supplies and tools with you at one place. All the tools that are needed for painting such as air brush or spray guns, masking tape, gloves, paint color, sand paper etc.
You must take care while buying these products as they should be of good quality. In case of paint, it should be chemical free. As many paints available in the market have harmful and abrasive chemicals in them.
2- Disassemble the helmet:
The next step in the process of how to paint a motorcycle helmet flat black is dismantle the helmet. It means that just remove those parts which are removable such as screws,visors, chin strap etc.
Put aside all these pieces and also remove the inner lining carefully. It is suggested to keep them away from paint area as you don’t want to ruin even by slightest of mistake.
3- Make your helmet ready:
Put on your gloves and clean the whole surface of your helmet. Clean it with commercial wax or any detergent that can easily remove the grease from the surface of the helmet.
You should buy the good quality grease remover from any automotive paint shops or hardware shops.
4- Do sand the helmet:
The next step is to sand the surface of the helmet to remove any old paint or any sticker pasted on the helmet. You must remove the shiny old paint on the helmet.
Furthermore, the new paint on an already painted surface looks awful. You can sand the helmet by using sand paper or an electric sander to save your time.
5- Mask your helmet with masking tape:
The next step is masking your helmet. Some helmets don’t have removable lining or cheek padding. So, you must mask those areas which you don’t want to paint.As getting off the paint from the areas which you don’t want to paint is quite a hell of job. So masking is an important step to follow .it can be done through a handy and feasible masking tape.
6- Apply the undercoat:
Now you must pain a undercoat before applying the actual paint coats. It’s like a primer.After getting it done keep it aside and let it dry. Don’t apply the paint until it fully dries.It is suggested to let them dry overnight and paint in the next morning.
7- Paint the helmet:
Now paint your helmet with a flat black paint color. The paint should be bought from a good automotive paint supply store. If the paint is in the can you can use paint brush to paint your helmet.
Some paints comes in spray bottles, you can also use that bottle to paint the helmet.Through whatever means you are doing paint, ensure that you must apply a thin coat to avoid any dripping. You must paint the helmet in same pace to get an even coat on the whole surface of helmet.
8- Apply the coats:
The next step in How to paint a motorcycle helmet flat black is that you must apply the several coats of the paint in the same way to get the proper finishing. You must apply many coats until you get the desired flat black color. It is suggested to apply four coats before applying the final coat on the helmet.
9- Apply the transparent coat:
After applying the final coat, you must apply the clear or matte finishing. This coat must be applied when the flat black paint coating is dried completely. It is applied to give a proper finishing to the helmet. You must not apply the shiny coat as it will take away the look.
10- Unmasking and reassembling:
After completing the finishing, now start unmasking the tape. After this also start assembling the parts of the helmet which you dismantle at the start. Make sure to assemble all the screws properly to avoid any mishap.In the end you’ll definitely love your end product.
Here are few suggestions about the things that many people ask while painting the helmet:
- You can use both the paint brushes or paint sprays for painting the helmet. You can sanding the helmet by hand or can also use sanding machine.
- You can paint any of your motorcycle helmet either it’s a full face helmet or a open face helmet.
- Plastidip is an air dry rubber coating spray that can be used but it is said that it peeled off after some time. So, I wouldn’t recommend this.
- Vinyl wrapping involves taking a big sticker and putting it on your helmet surface.It can be difficult for newbie but becomes an easy task after some experience.
Conclusions:
Painting your helmet at home is not a rocket science. Every rider at home can do this to give their helmet a new and elegant look.Hopefully; this step by step process will help you to know How to paint a motorcycle helmet flat black at home. In the end, you will definitely get a fine tuned and proper finishing flat black painted helmet.

